How to install Windows 10 on
Your PC?
Windows 10 is a major version of the Windows NT operating system developed by Microsoft that was released on July 29, 2015. It
is built on the Windows NT kernel and follows Windows 8. It is designed to provide a common, "universal" user interface for
various systems. These include desktop, laptop, and all-in-one PCs, tablet PCs, smartphones, and embedded systems such as
the Xbox game console which allows Microsoft to integrate each and every type of platform with greater ease.
These are few steps to install windows 10 on your PC easily.
We have some of these steps that you need to know to get Windows 10 installed on your PC. Whether you are putting it on a
PC for the first time or upgrading an earlier version of Windows, or just want to perform a clean installation on a PC that
already has Windows 10 on it.
1. Make sure that your device consists of some of these minimum system requirements.
For the latest version of Windows 10, you will need to have the following: CPU: 1 Gigahertz (GHz) or faster supported
processor RAM: 1 Gigabyte (GB) for Windows 10 32 - bit or 2 Gigabytes (GB) for Windows 10 64 - bit Storage: 32 Gigabytes
(GB) of space or more GPU: Direct X 9 compatible or later with WDDM ( Windows Display Driver Model ) 1.0 driver Display:
800 x 600 resolution or more Internet connection: Some versions of Windows 10 require an internet connection during setup.
2. Create installation media.
Microsoft has a special tool through which you can create installation media. You can download that tool from browser by using
this link, or by going to this page and then select the option “Download tool now” under the section named by “Create Windows
10 installation media.” You will need a blank USB (Universal Serial Bus) drive with at least 8GB of space (or a blank DVD) to
put the Windows 10 installation files on it.
You will need to run the tools, accept Microsoft’s terms, and then select the option “Create installation media for another PC”
when you get to the “What do you want to do?” page. You will select the language of your choice, and the edition of Windows you
want as well as whether it will be of either 32-bit or 64-bit, and then select the option type of media you want to use.
Installing from a USB drive is easiest method, but you can find details on using a DVD and ISO file here too. You will then
choose your USB drive from a list of drives, and the tool will download the necessary files and put them on the USB drive.
3. Use the installation media.
Once you have created installation media, you’ll need to insert it into the PC you want to install Windows 10 on, and then
access your PC's BIOS (basic input / output system) or UEFI (unified extensible firmware interface). This is the system that
allows you to control some of these aspects of your PC's hardware, and it is built into your motherboard. This step is very
unique to your specific hardware, so we cannot walk you through exactly what want to do. But you should be able to figure out
all of the process for accessing this by checking and monitoring on your PC or motherboard manufacturer’s website.
Generally accessing a PC's BIOS (basic input / output system) or UEFI (unified extensible firmware interface) involves holding
a specific key during the boot process, often by Escape button, F1 button, F2 button, F12 button, or Delete button. So, figure
out which of these keys of your PC works in proper way, then after this shut down your PC. And boot it back up, and hold the
necessary key as soon as it starts to boot.
4. Change your PC's boot order.
In your PC's BIOS (basic input / output system) or UEFI (unified extensible firmware interface), you will need to search for
the settings for boot process in order to follow the next step. This may view in a section with options called either "Boot"
or "Boot order." This decides which devices are used first and so on when the PC starts up in proper manner.
The PC will not boot into the Windows 10 installation tool till the drive it is on is higher up in the boot order then the
drive holding all the PC's current operating system. You should move the drive (whether it is your USB drive or a DVD drive)
to the top of the boot order menu option. You may also need to disable the Secure Boot if your PC uses it.
5. Save settings and exit BIOS (basic input / output system) / UEFI (Unified Extensible Firmware Interface).
Your PC should now boot into the Windows 10 installation tool, which will guide you through the process of setting up
Windows 10 on your PC.
6. Installation of Windows 10.
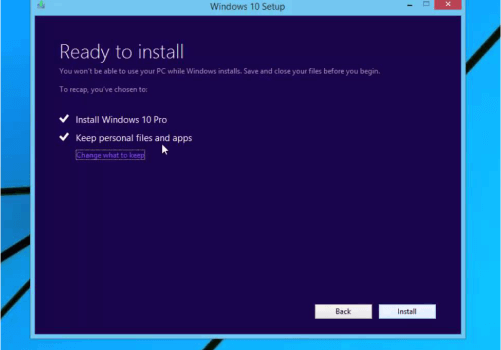
When you reach the installer screen, select “Install Now” and follow the instructions to install Windows 10 on your PC.
When you see the Activate Windows screen, you will need to either enter a key or skip it. You may not see this screen if
Windows 10 automatically detects a key associated with your PC’s hardware.
If you have never installed and activated Windows 10 on this PC before, enter your Windows 10 key here. If you don’t have key,
but you have a valid Windows 7, 8, or 8.1 key, enter it here instead. If you have previously taken advantage of the free
Windows 10 upgrade offer on this PC, click “I don’t have a product key”. Windows will automatically activate with a “digital
license” linked with your PC’s hardware on Microsoft’s servers once it is installed. When you find this option of “Which type
of installation do you want?” on screen, click “Custom” to perform a clean installation and remove everything from your PC.
Thanks!
Call Now


